Starting Slide Shows
It is time to start finishing up the different parts. Remember we are going to be using fbi to display the images. if you type in {{fbi}} into the terminal and hit enter it will show you all of the options for fbi. Now your preferences and mine are going to be different so I suggest that you read through what is available and choose the ones that you like. Before I get to my preferences if you are trying to start fbi from ssh you are going to have to include an extra setting so it know to use the monitor as the display instead of trying to show you them in the ssh window which just spits out an error. Now the code. I suggest you make an script for this line so if you want to change settings you can change the script instead of having to go modify boot files. If you download my files one of the files is to start the slideshow. {{fbi -noverbose -a -u -t 10 /home/pi/drive/*.JPG}} Lets go through this piece by piece.- fbi = is the program we want to run
- -noverbose = tells the program not to show the file names
- -a = tells the program to auto zoom the pictures
- -u = tells the program to pic random pictures
- -t 10 = tell the program that we want 10 seconds on each picture
- /home/pi/drive/*.JPG = /home/pi/drive/ is the directory that the pictures are in. *.JPG says we want all the pictures with .JPG file extension. Remember that linux is picky about capitalization so it will not show .jpg files.
- if you want to be able to start from ssh you must add -T 1
- If you want to show multiple file types you should add this at the end of the above /home/pi/drive/*.XXX (xxx= what ever file format you want) make sure you give the directory location again.
- You can also specify specific files if you prefer by replacing the * with the file name
That last thing to do is have the slideshow start when we boot the device. To do that we edit the login script for the user, in my case slideshow. {{sudo nano ~slideshow/.bashrc}} You just need to add a line to the end of this file {{/home/pi/drive/scripts/slideshow.sh}}. So now every time you turn the pi on it will automatically start a slideshow using the pictures based on the information in the scripts.
Weather Setup
Most of the code for this section came from the kindle weather display. I had to make modifications because I wanted it to fill the screen instead of showing something designed for the kindle screen.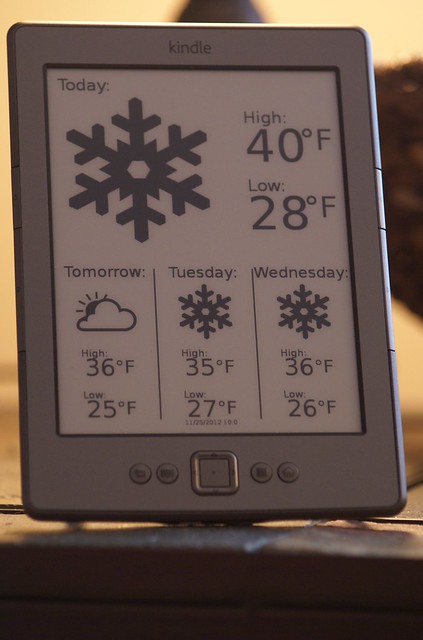

As I always suggest to people when they are doing design work for anything. Start with a piece of paper. It is much easier to sketch something out the try to throw things together on a computer. Now once you have the idea you have to get to work designing it on the computer. I did not start from scratch, but rather I took the file for the kindle weather display and modified to fit my needs. Now I am not an expert on any of what I am doing, I know just enough to be dangerous. When I redesigned the layout I got a little to ambitious. I suggest just modifing my file or the kindle one until you get it how you want.
Next we need to get the information. Again I took the kindle python script and added things until it got what I needed. This was one of the hardest parts of this whole project. I am not a programmer. I know the basics but this was one of my first real projects that used python. If I was asked to write the program from scratch I would be up a creek without a paddle and I probably wouldn't even have a canoe. After a lot of troubleshooting and research I was able to add the information that I wanted. Now whether you use my files or the files from the guy who orignally made the kindle picture from you are going to have to atleast edit the python file so that it has your correct location. there are 2 lines you need to modify. The first is the lat and lon in the 21 line of my file which is almost a direct copy of his. It is in decimal format so make sure you replace it with decimal format. You also need to find your local airport page. Go here, click on your state, then choose your closest airport. then look in the address bar. The webpage should be 4 letters.html. Change the last 4 letters of line 25 before the .xml to match the new ones.
The last step is to convert what the python script outputs and convert it to something that we can display. This is done using rsvg that we installed in a previous post. {{rsvg file.svg file.png}} will convert a file with svg format to png. make sure that you include the directories if you are not in the correct folder. I have a script written that does this all for me automatically. Makes my life simpler. I like to run this ever 30 minutes or so and will get into that next time.
Left to do
- Schedule events to happen and specific times
- Program remote buttons to actually do what they are suppose to do
- Add an input to monitor weather the monitor is on or off, will use the status led of the monitor as an output
- Make a cheat cheat for specific file locations
- Build a nice frame
- Gather pictures
- Test
- Give as present
Do you have the modified script that creates the bottom picture? I am doing a Kiosk version of this and want to place that type on the left with my changing pictures on the right.
ReplyDeleteDaren, what you need is the weather folder in the following zip folder. https://drive.google.com/file/d/0B7CaHHOgpPgJWkVLR0ZIdVJqVVE/view?usp=sharing
ReplyDeleteThere is no weather folder in it..
DeleteMy bad. here is the link for the weather folder. the python script is what creates it and it uses the preprocess svg file for layout
Deletehttps://drive.google.com/file/d/0B7CaHHOgpPgJbW9WcHFHT3YzZDQ/view?usp=sharing
This comment has been removed by the author.
ReplyDelete